|
|
Size(inches) OD(inches) ID(inches) Weight(lbs/ft) 1-1/2 1.900 1.610 2.72 2 2.375 2.067 3.65 2-1/2 2.875 2.469 5.79 Tall picture.scroll down.... |
||||
|
|
As you can see from the table above, pipe the next size smaller is not a tight fit inside the larger pipe. To take up the slop, I welded three beads around the circumference of the smaller pipe, then ground them down as necessary for a good fit. I overlapped the pipes about two feet and pinned them with 5/16" bolts. This worked very well and there is no wobble of the top section. The bottom 2" pipe is the full 21' length, and the top 1-1/2" pipe is about 17' long to give the total of 36' with the 2' overlap. The drawing to the left (not to scale) shows the base and some of the details of the assembly. The base is made of another 21' piece of 2" pipe cut in half to make a 10-1/2' long base unit. The pipes are spaced a little more than one pipe diameter apart and secured by welding 3/16" X 2" steel strap between them. The mast pivots on a 3/8 X 8" bolt at the base midpoint just above ground level (dashed rectangle). This leaves about 5' of base both above and below ground. The weight of the mast is over 120lbs, so some kind of winch is needed to erect it. I do this by hooking a comealong to the middle strap, running the cable over the removable pulley, and hooking to a temporary clamp attached to the pole. Very little effort is required to lift the pole with the comealong; the maximum tension on the line is only about 600lbs. When the mast is brought nearly vertical, the cable and pulley are removed, and bolts, nuts, and lockwashers are put in the top and bottom straps to hold it in place. More details are given with the pictures below. You can click on them for a larger version. |
||||
|
|
The hole for the base is 6' deep and about 11"-12" in diameter, slightly wider at the bottom. I was lucky to be able to dig it with only a post hole digger and a 10' piece of EMT conduit flattened at the end to make a chisel. If you look closely you can see the ends of the PHD handles in the hole! The bottom ends of the base pipes are left open, and I back-filled the hole with about 6" of gravel for drainage. It took (9) 80lb bags of concrete to fill this hole back up. The two mast sections overlapped 2' and pinned with bolts at right angles. I then filled the gap between the pipes with RTV to keep water from running down inside. |
||||
|
|
|
||||
|
|
The base set in concrete. The stump to the right is all that's left of my old tree mast. |
||||
|
|
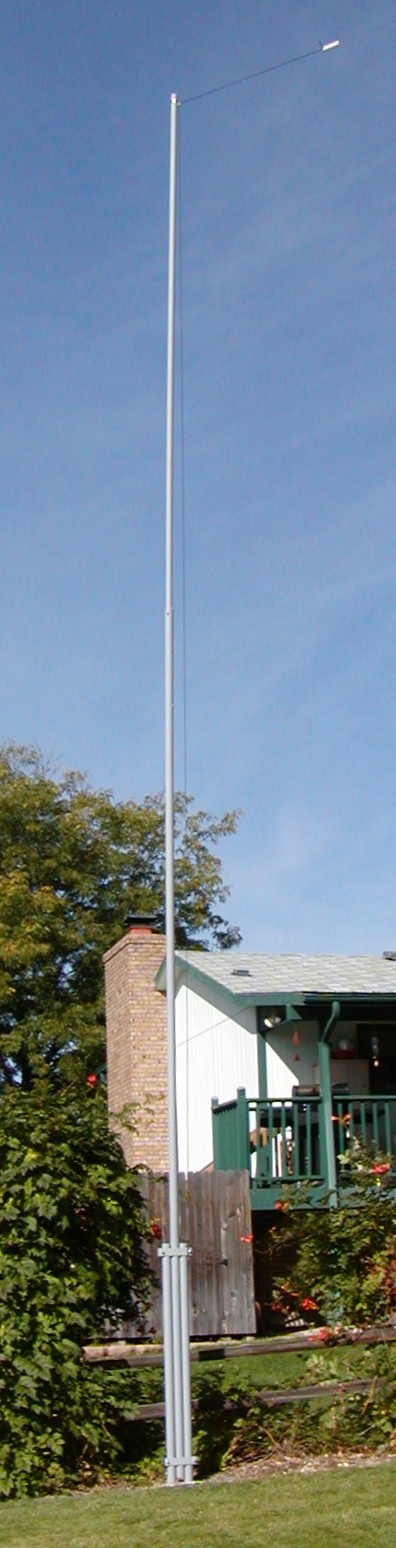
The base with the mast secured in the upright position. Hey, what happened to that stump? Tools used to raise and lower the mast: comealong, pulley, and hook clamp. The hook clamp attaches to the mast at about the 6' point, just above where the pulley in the vertical position. The pulley is made by sandwiching a sheave between two pieces of 3/16" X 2" strap. Slots are cut into the strap so that it will drop over the upper strap on the base unit. |
||||
Update February 2011:I've had two of these masts up for about 7 years now. I started out with one, and then another tree died. I'm supporting 70ft dipoles and ladder line with both of them, and both are constructed exactly as described. I've had winds of up to 70MPH on one occasion I know of, and both masts are doing fine. I guess I got lucky, because I can't think of anything I'd want to change. |
|||||
Grounding update:I knew when I made these that for lightning protection I should probably install ground rods even though there are trees and other structures in the area that are taller than they are. I didn't do it right away, so after a while of not having any problems, I pretty much forgot about doing it. Well it finally happened, one of them took a direct hit and it cracked the concrete base. Structurally I think the base is still solid, so I don't think any significant harm was done, but that was enough to get me put the grounds in.
|
|||||
Photos from other buildersSometimes people send me pictures of the masts they've built, often adding accessories like electric or hand-cranked winches, or using them with other types of antennas. If you have a photo of a mast like this you've made and want to share it, email it to me and I'll add it to the gallery. |
|||||
KA5HSY:
|
|||||
KU0D:
|
|||||
K7ZOO:
|
|||||
CE5DDC:
|
|||||
KE8BTO:
|
|||||
W8VO:
|
|||||